| Version 2 (modified by , 17 years ago) ( diff ) |
|---|
Guide - Using the EventGhost web server
To use the EventGhost web server the following softwares are needed:
Procedure
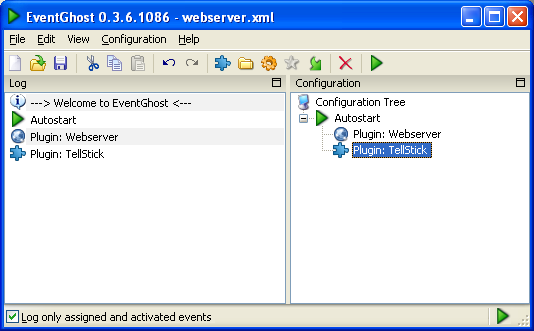
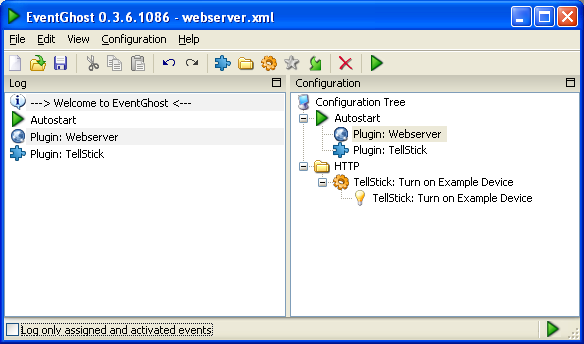
1. Start EventGhost.
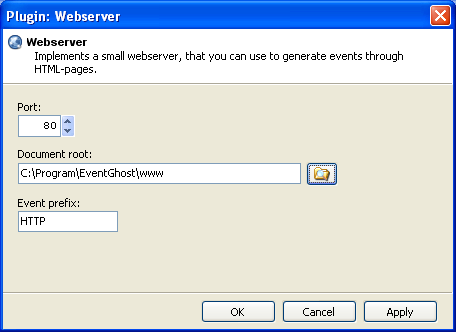
2. Add plugin, choose "Webserver" which is found under "Other".
3. Choose which port to use. Usually port 80 is used. Choose which folder the html-file is to be located, for example "C:\Program\EventGhost\www".
4. Add plugin, choose "TellStick" which is found under "External Hardware Control".
5. Preferably create a new folder, named for example "www" or "http".
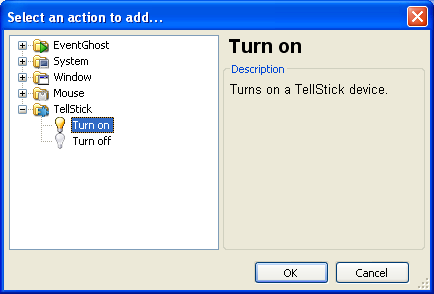
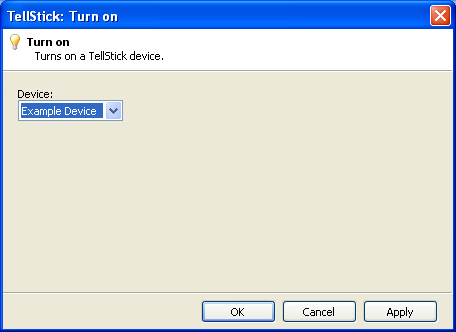
6. Add a new macro, choose event TellStick - turn on.
7. Choose unit to switch on.
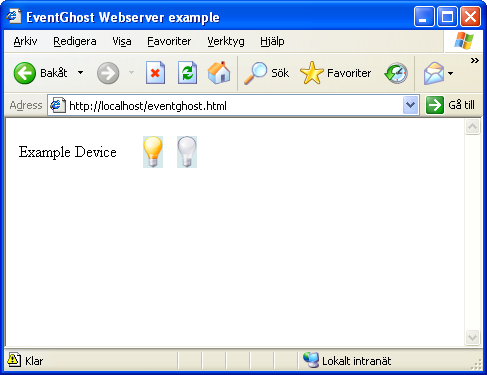
8. Create a new file in the new folder (i.e. for example "C:\Program\EventGhost\www" or "C:\Program\EventGhost\http"). In this example the name of the file is eventghost.html. Enter the following content into the file:
<html>
  <head>
    <title>EventGhost Webserver example</title>
  </head>
  <body>
    <table border="0">
      <tr>
        <td width="120">Example Device</td>
        <td width="30"><a href="eventghost.html?Example-Device_ON"><img border="0" src="lamp-on.png"></a></td>
        <td width="30"><a href="eventghost.html?Example-Device_OFF"><img border="0" src="lamp-off.png"></a></td>
      </tr>
    </table>
  </body>
</html>
OBS: If the file name is changed the link (i.e. "...eventghost.html...") also has to be changed.
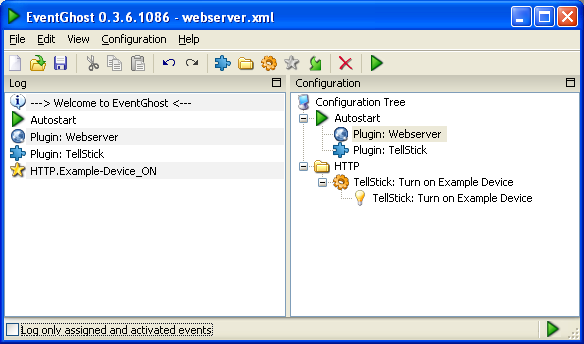
9. Uncheck "Log only assigned and activated events."
10. Open the file in your web browser by browsing the address http://localhost/eventghost.html
11. Click the lamp for on.
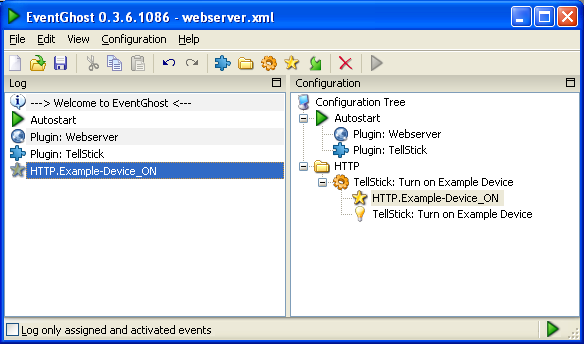
12. Pull the button combination from the log window to the left to the macro.
13. Follow the guide from 4 to 6 and from 9 to 11 to create the corresponding off command.
14. Test the macro by clicking the icons for on and off in the web browser.
Download
Here the html example and the xml file are available to download: eventghost_webserver.zip.
The xml file should be placed in My Documents\EventGhost.
If you follow this guide the html and png files should be placed in C:\Program\EventGhost\www.
Attachments (10)
- Webserver1.png (25.1 KB ) - added by 17 years ago.
- Webserver2.png (15.5 KB ) - added by 17 years ago.
- Webserver3.png (27.5 KB ) - added by 17 years ago.
- Webserver4.png (15.6 KB ) - added by 17 years ago.
- Webserver5.png (12.2 KB ) - added by 17 years ago.
- Webserver6.png (32.0 KB ) - added by 17 years ago.
- Webserver7.png (30.5 KB ) - added by 17 years ago.
- Webserver8.png (31.6 KB ) - added by 17 years ago.
- Webserver9.png (32.1 KB ) - added by 17 years ago.
- Webserver10.png (36.1 KB ) - added by 17 years ago.
Download all attachments as: .zip


